Before you wrap a vehicle, it is really important to make sure that you clean it properly. If you don’t clean it properly, you will run into a lot of problems both during and after the application. Your customer has no idea how clean a vehicle has to be for you to wrap it properly…and they will never bring you the vehicle clean enough. So cleaning the vehicle properly is completely up to you!
Before cleaning a vehicle, you must remove the items that either will not be wrapped or items that make the application difficult such as windshield washer jets, rear wipers, and for some applicators, headlight and taillights.
Areas like grills, wheel wells and fog lights accumulate a lot of road grit. Throughout the duration of your application no matter how well you clean the surface of the vehicle, each time you open and close the doors, hood and trunk, a little of this road grit shakes loose and sticks to the adhesive of your graphic.
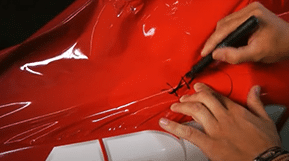
I have learned that applying masking tape to these areas can help in two ways; first of all the masking tape will help catch any road grit that happens to come loose with the opening and closing of doors. Secondly, the masking tape will protect highly polished surfaces like chrome from the threat of wandering knife blades.
After the application is complete the masking tape can be removed.
Many applicators make the mistake of using soaps and detergents designed to leave a highly polished finish. Although the vehicle looks perfectly clean, these cleaning agents leave a thin residue which contaminates the surface and often leads to adhesive failures later on.
When choosing cleaning chemicals, I always go simple. First, clean with a soap and water solution; just a couple drops of dish soap to a squirt bottle of water. This will remove 90% of the dirt. Then, clean with an alcohol solution; 70% isopropyl alcohol and 30% water. This will cut most oil based surface contaminates as well as evaporate any water left on the vehicle from the initial clean.
When choosing a cloth, I prefer to use lint free automotive cloth as shown here. The cloth you choose should be lint free and soft enough to absorb dirt while continuing to clean.
Always start cleaning from the top of the vehicle down. Usually the bottom of a vehicle is dirtier than the top. No sense dragging that dirt to cleaner parts of the vehicle. Cleaning sections like this makes it easier to keep track of where you have and haven’t cleaned.
Extra care must be taken when cleaning door frames which include fuel doors, hatchbacks and tail gates, as well as wheel wells and bumpers. Often applicators will clean only the exact areas that will be wrapped. It is best to clean 3 – 5cm further so that static from your graphic can’t draw dirt in from these areas.
If you are doing a color change vehicle wrap it will be necessary to clean the entire door frame area as it will be completely wrapped.
Before doing a final clean around wheel wells, take some used cloth and clean out the three dimensional dirt first. Then, proceed to clean carefully with a clean cloth.
Bumpers can be tricky to clean properly because of their contours and details like badges and foglamps. Because of these compound curves and contours, this is the area of the vehicle which puts the greatest amount of stress on the graphics being installed which makes it critical that this surface is cleaned properly.
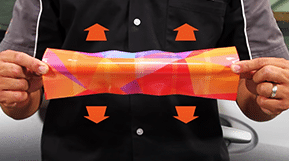
Often applicators feel the need to use adhesion aids like surface primers and edge sealants when wrapping challenging parts of the vehicle like leading edges and bumpers. If the vehicle is cleaned properly, Arlon wrap products give you the unique advantage of completing your vehicle wrap without the need for additional chemicals which often damage the vehicles finish and make graphic removal much more difficult.
If you clean the vehicle properly, you are guaranteed to have a successful wrap.


